Insights & Resources
Perspectives on managed WebOps, digital platforms, and technology
Practical writing on cloud infrastructure, CMS operations, and what it actually means to run a managed platform for government, higher education, and healthcare organizations.
Recent articles

WordPress vs Cascade for Higher Education: An Operating-Model Comparison
Choosing between WordPress and Cascade for a higher education website is not a feature comparison. It is a decision about which operating model the institution wants to run.
Five Failure Modes of Cascade Website Hosting in Higher Education
Cascade publishes content reliably. The production hosting environment that receives the published output fails in five specific ways during enrollment cycles, and the symptoms are predictable.

Drupal on AWS GovCloud vs Azure Government: The Institutional Decision Filter
Both AWS GovCloud and Azure Government run institutional Drupal workloads at FedRAMP scale. The decision between them is not about which cloud is better. It is about which cloud fits the agency's existing stack, identity model, procurement, and operational maturity.

Why Drupal Dominates Government Websites
Drupal powers a majority of US federal websites and a substantial portion of state and local government digital services. The reason is structural: Drupal's defaults match what government procurement and operations actually require.

Managed Drupal Hosting for Government: A Buyer's Guide
Selecting a managed Drupal hosting partner for a federal, state, or local agency is a multi-year procurement decision. Six evaluation dimensions separate operationally mature partners from integrators with marketing budgets.

Drupal Performance for Institutional Sites: The Operational Discipline That Holds
Drupal performance for institutional sites is a layered discipline: caching at multiple tiers, database hygiene, asset optimization, CDN delivery, and ongoing measurement. This is the operational pattern that produces sustained performance for public-sector Drupal.

Preparing Public-Sector Teams for Cloud Migration: Five Things That Actually Matter
Cloud migration in public-sector institutions is more about people than technology. The migrations that succeed share five operational practices around team preparation. The migrations that struggle skip them.

WordPress Performance Optimization for Beginners: The Institutional Starting Set
WordPress performance optimization is layered, but most institutional sites only need the foundational set to reach acceptable performance. This is the starter pattern for institutional WordPress operators new to performance work.

Amazon EC2 for Public-Sector Workloads: When and Why It Fits
Amazon EC2 is the foundation of most public-sector AWS adoption, but the structural fit depends on the workload pattern. For institutional applications requiring traditional server runtimes, EC2 with appropriate operational discipline is the right answer.

Drupal Performance Practitioner's Guide: The Tools and Commands That Move the Needle
Drupal performance work is concrete: specific Drush commands, specific contrib modules, specific configuration changes, specific monitoring queries. This is the practitioner's guide for institutional Drupal teams who need to act on performance, not just theorize about it.

Cloud Security Compliance for Public Sector: What Shared Responsibility Actually Means
Cloud security compliance in public-sector contexts requires understanding what the cloud provider's authorization covers, what the institution's authorization has to cover, and the operational practice that produces audit evidence on a continuous basis.

AWS for Nonprofits: The Programs and Discounts That Actually Move the Cost Curve
AWS publishes nonprofit-specific programs (the Nonprofit Credit Program, IMAGINE Grant, public-sector pricing) that reduce the AWS cost line for eligible institutions. This is what those programs actually deliver and what the institutional eligibility requires.

AWS Cloud Computing in 2020: Why the Pandemic Year Accelerated Public-Sector Adoption
The 2020 pandemic year accelerated public-sector cloud adoption by years. AWS specifically benefited from the procurement and operational characteristics that fit pandemic-era institutional needs.

AWS Cloud Hosting for Public-Sector Workloads: An Architecture Reference
AWS hosting decisions for public-sector workloads come down to four architectural patterns. Picking the right one is mostly a function of compliance posture, traffic profile, and operational ownership.

AWS Continuity of Government IT: How CGIT Supports Institutional Resilience
AWS launched the Continuity of Government IT program at re:Invent 2022 with a tiered approach to operational resilience. For agencies whose continuity planning is dominated by paper documents rather than tested operational reality, the program is structurally useful.

Why AWS Consulting Partner Status Matters for Public-Sector Procurement
AWS Consulting Partner status is sometimes treated as a marketing badge. For public-sector procurement, it is a procurement signal: documented competency, named accountability, and a defined relationship between the customer's contracting officer and the cloud provider's partner organization.

AWS GovCloud Explained: What It Is, Who Uses It, and When It's the Right Choice
AWS GovCloud is the isolated AWS region for federal workloads with FedRAMP High, ITAR, or DoD compliance constraints. The structural question for agencies is whether the workload actually requires GovCloud, or whether commercial AWS regions with appropriate configuration are the right fit.
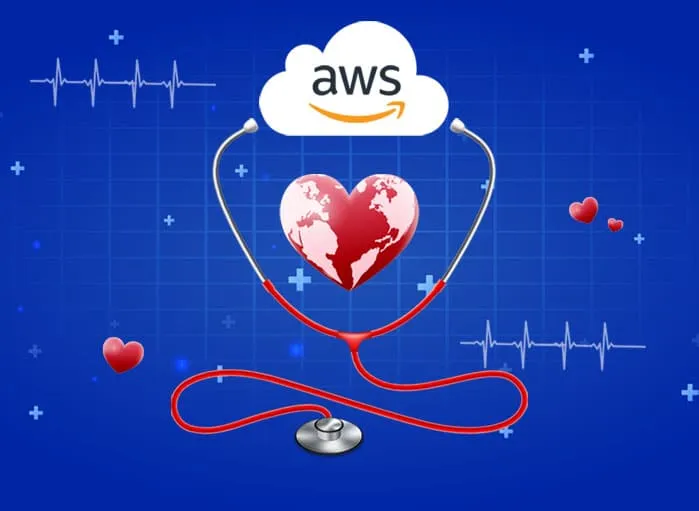
AWS for Healthcare: A Practical Guide for Public-Sector Health Workloads
AWS for Health is the AWS portfolio for healthcare, biopharma, and genomics workloads. For public-sector health entities (state Medicaid, public hospitals, academic medical centers), the operational discipline matters as much as the service catalog.
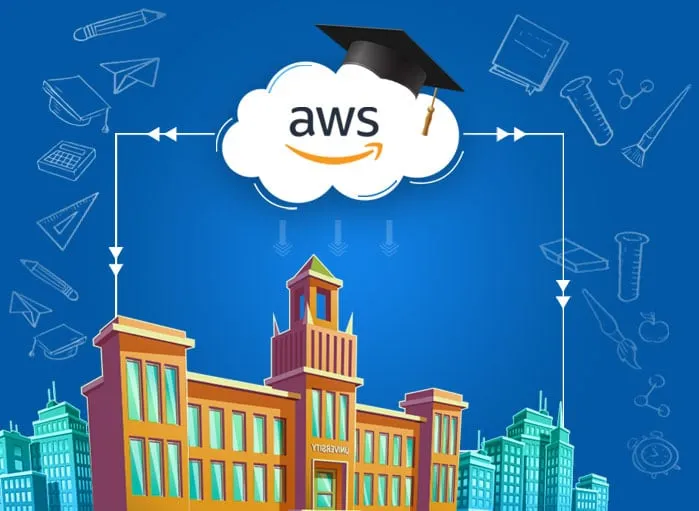
AWS in Higher Education: Operating Patterns That Actually Hold
AWS adoption in higher education has matured past the early-experiment phase. The institutions getting durable value from AWS share specific operating patterns: account governance, identity through the campus IdP, cost discipline, and workloads aligned to actual institutional priorities.

AWS for Higher Education: What Institutions Actually Use It For
Higher education AWS adoption falls into three workload categories: institutional websites and applications, research computing, and student-facing learning platforms. Each has its own operational pattern, compliance posture, and procurement path.
AWS for Nonprofits: Programs, Credits, and What Actually Helps
Nonprofits adopting AWS face a different calculus than commercial buyers: limited budget, mission-driven workloads, and the specific AWS programs designed to support sector. This is what works in practice.
AWS Security Baseline for Institutional Workloads
AWS provides the security tools. The institution provides the operational discipline. This is the AWS security baseline that holds up to public-sector audit: account structure, identity, encryption, logging, vulnerability management, and incident response.
AWS Web Hosting for Institutional Sites: The Decision Filter Across Hosting Models
AWS offers multiple web-hosting models: Lightsail, S3 static hosting, EC2-based architectures, ECS/EKS containers, and Amplify. For institutional sites, the right model depends on the workload profile. This is the decision filter.

Azure Shared Responsibility: What CSP Customers Own Above the Hypervisor
Microsoft manages the physical infrastructure and hypervisor. Everything above it (OS patching, IAM, network configuration, application security) is yours. Most organizations operating Azure through a CSP don't have operational ownership of any of it.

Public-Sector Cloud Provider Landscape: A 2020 Snapshot
By early 2020, the public-sector cloud landscape had effectively narrowed to AWS and Azure for most agency workloads. The other providers had specific niches but did not match the procurement and compliance posture public sector required.

Advanced WordPress Optimization: The Techniques Beyond the Foundational Set
After the foundational performance practices are in place, the advanced WordPress optimization techniques deliver incremental gains for institutional sites with high traffic, large content volumes, or specific performance requirements. This is the advanced playbook.

Drupal Caching: A Practitioner's Implementation Guide
Drupal caching for institutional sites is a multi-layer implementation: cache backend, page cache, dynamic page cache, render cache, BigPipe, Varnish, and CDN. This is the practitioner's guide for putting them in place.

Brace Yourself for the Drupal 10 Release: What Institutions Needed to Know
Drupal 10 shipped on December 14, 2022 after a six-month delay, with CKEditor 5, Symfony 6, PHP 8.1, and a deliberate path forward from Drupal 9. This is the prerelease context that shaped institutional planning.

The Business Case for Cloud Migration in Public-Sector Organizations
Cloud migration in public-sector contexts is rarely justified on cost alone. The structural value comes from agility, resilience, and the operational discipline that mature cloud environments enforce by default.

Cascade CMS 8.23 Release Notes: What Changed and Why It Mattered
Cascade 8.23 was a minor release with three operationally significant changes: GA4 support, stronger password policy aligned to NIST 800-53, and improvements in publish reliability.

Cascade CMS 8.24 Release Notes: Asset Reporting, WebP, and Siteimprove Prepublish
Cascade 8.24 was a feature release with Suggested Unused Assets reporting, WebP image support, and Siteimprove prepublish integration. Each addressed a specific operational pain in higher ed.

What Cascade CMS Looks Like From a Developer's Perspective
Cascade CMS is often described as a content authoring tool, but the platform's developer-facing surface is where the real institutional decisions get made.
What Cascade CMS Looks Like From a Marketer's Perspective
Marketing teams in higher education need governance and consistency more than they need theme flexibility. Cascade is built for that priority order.

The Cascade CMS Hosting Gap: What Hannon Hill Doesn't Manage and Who Should
Hannon Hill manages the SaaS. Nobody told you who manages the production infrastructure that receives your published output.

How Cascade CMS Supports Modern Search Optimization
Search optimization for institutional websites is no longer a marketing exercise. It is an operating discipline that depends on what the CMS makes structurally possible.

Cloud Computing Security Practices for Public-Sector Workloads
Cloud computing security is operationally different from on-premises security. Public-sector workloads require seven specific practices that account for the shared responsibility model and the audit posture compliance frameworks expect.
Cloud Cost Management for Public-Sector Workloads: What Actually Works
Cloud cost management tooling has matured substantially since 2020. For public-sector institutions, the operational discipline matters more than the tool selection. Here is what cost management actually looks like in practice.

Azure Migration for Public-Sector Workloads: When It's the Right Fit
Azure migration in public-sector contexts is most often the right fit for institutions already running Microsoft stacks at depth. The integration with Active Directory, Exchange, and SQL Server is a structural advantage that AWS does not match.

Cloud Security Challenges in Public-Sector Adoption: What's Actually Different
Cloud security challenges in public-sector contexts differ from commercial contexts in specific ways. The threats are similar; the consequences, the compliance posture, and the operational discipline required are not.

Choosing a Cloud Service Provider for Public-Sector Workloads
Cloud service provider selection in commercial contexts is mostly about feature fit and price. In public-sector contexts, compliance posture, procurement path, and existing skill base typically matter more than the technical comparison.

Core Web Vitals for Institutional WordPress Sites
Core Web Vitals affect WordPress search rankings and user experience. For institutional WordPress, the metrics translate to enrollment, donor engagement, and visibility on the queries that matter.

Drupal 10.1: The First Feature Release on the Drupal 10 Series
Drupal 10.1 shipped in June 2023 as the first feature release on the Drupal 10 series. For institutional Drupal operators, the 10.1 release pattern is what to expect from minor releases through the Drupal 10 lifecycle: incremental capability, no breaking changes, routine upgrade.

Drupal 10 Upgrade Best Practices: The Operational Catalog
The Drupal 10 upgrade is a structured operational engagement, not an ad-hoc change. This is the catalog of best practices that institutional Drupal teams follow to produce clean upgrades with documented evidence.

Drupal 10 Upgrade: The Institutional Cost of Inaction
The Drupal 10 upgrade is not just a feature upgrade. For institutions still on Drupal 9 in 2023 (and on Drupal 7 or 8 even later), the cost of inaction has compounded. This is the institutional case for upgrading.

Drupal 10 Upgrade Checklist: What Institutions Actually Need to Plan For
Drupal 10 was a relatively contained upgrade for institutions already on Drupal 9. The work was concentrated in PHP and Composer prerequisites, deprecated API removal, and theme migration to CKEditor 5.

Drupal 7 End of Life: Lessons From the Long Goodbye
Drupal 7's EOL was extended twice before reaching its final sunset in January 2025. The pattern of those extensions, and how agencies handled them, says a lot about how public-sector technology actually transitions.

Drupal 7 vs Drupal 8 vs Wait for Drupal 9: The 2020 Upgrade Decision
In early 2020, institutions running Drupal 7 or 8 faced a strategic decision: upgrade now to D8, wait for D9, or skip ahead. The answer was different for each version's owners, and the operational consequences played out over the next several years.

Drupal 7 to Drupal 9 Migration: The Tools and Tactics That Worked
Drupal 7 to Drupal 9 migration was structurally a re-platform. Three specific tools made the work tractable: the Migrate API, Upgrade Status, and Drupal Module Upgrader. The institutions that used them well captured durable migration outcomes.

Drupal 8 to Drupal 9 Migration: The In-Place Upgrade Path
Drupal 8 reached EOL in November 2021. The migration to Drupal 9 was structurally an in-place upgrade rather than a re-platform, and the institutions that approached it that way captured the smooth path Drupal 9 was designed to provide.

Drupal 9 Readiness Checklist for Institutional Sites
Drupal 9's design philosophy made the upgrade structurally smooth from Drupal 8, but the operational checklist still mattered. For institutional sites under audit cycles, the readiness work was the difference between a clean upgrade and an emergency.

Drupal Cache Mechanics: How the Layers Actually Work
Drupal's caching architecture (cache tags, cache contexts, dynamic page cache, BigPipe) is more sophisticated than most CMS caching layers. Understanding the mechanics is what separates configured-but-broken caching from caching that produces sustained performance.

AWS GovCloud for Operational Resilience: Beyond Compliance Authorization
AWS GovCloud is most often discussed as a compliance authorization vehicle. The operational resilience it provides for agencies whose workloads genuinely require it is a separate value proposition worth understanding directly.

Why CMS Selection Matters More for Higher Education Than Most Sectors
A higher education website is not a marketing site. It is a long-running institutional platform with constraints around governance, accessibility, scale, and integration that compound across years of operation.

Higher Education CMS Selection: The Institutional Decision Criteria
Higher education CMS selection is a multi-year operational decision, not a feature comparison. The criteria that hold for institutional higher-ed sites are governance, accessibility, scale, integration, and editorial workflow. This is the decision framework.

AI for Emergency Response and the Public Cloud: A 2020 Perspective
Wildfire seasons in 2020 made it clear that emergency response was becoming an AI workload, and that public cloud was where those workloads were being built and operated.
Getting Started With AWS EC2 for Institutional Workloads
AWS EC2 is the foundation of most institutional cloud workloads. The setup is well-documented; the operational discipline that makes EC2 production-grade for public-sector contexts is the harder part.

Cloud Governance for Public Sector: The Four Adoption Challenges That Persist
Cloud adoption in public-sector organizations has matured past the early-adopter phase, but four specific governance challenges persist across most institutions: cybersecurity, regulatory compliance, integration with existing systems, and access management.

AWS Cloud Security for Public Sector: A Layered Defense View
AWS provides a substantial security tooling portfolio. The structural value for public-sector workloads comes from operating the tooling as a layered defense, not from any single capability.

WebOps Governance for Higher Education: Why IT Policy Doesn't Survive Contact with a CMS
Every higher education IT department has a web governance policy. Most of them aren't enforced, because the infrastructure doesn't support enforcement. Here's what operational governance actually requires.

Why Higher Education Institutions Pick Cascade CMS
Universities don't pick Cascade for the feature list. They pick it for an operating model that survives institutional governance, distributed teams, and scale.

Cascade CMS 8.24.1 Release Notes: A Maintenance Release Worth Auditing
Cascade 8.24.1 was a maintenance release with a meaningful security upgrade (OpenJDK 11.0.21+9) and reliability fixes for workflow editing and content reporting.

Speeding Up Institutional WordPress Sites: Six Performance Practices That Hold
WordPress performance for institutional sites depends on six operational practices that compound. Hosting tier selection matters most; plugin discipline matters more than most institutions invest in.

Selecting a Managed WordPress Hosting Provider: The Institutional Evaluation Framework
Selecting a managed WordPress hosting provider is an institutional procurement decision that shapes the next 3 to 5 years of WordPress operations. This is the evaluation framework that institutional teams use to make defensible vendor choices.
AWS EC2 Replace Root Volume: A Reference for Public-Sector Operations Teams
EC2 Replace Root Volume launched in 2022 and changed the operational pattern for patching, recovery, and image refresh on long-running instances. For public-sector workloads under audit, the change reduced the operational gap between detected vulnerability and remediated state.
Managed WordPress Hosting 101 for Public-Sector Institutions
Managed WordPress hosting is the operational alternative to running WordPress on shared hosting or generic VPS. For institutional WordPress operators, the managed hosting decision is about offloading the operational tier to a partner. This is the institutional 101.

What Drupal 9 Actually Changed: A Reference for Institutional Operators
Drupal 9 was deliberately not a major architectural change from Drupal 8. The differences mattered operationally in specific ways that affected institutional upgrade planning.

Proprietary vs Open-Source CMS for Higher Education: A Practical Comparison
Cascade CMS represents the proprietary path for higher education. Drupal and WordPress represent the open-source path. The decision is rarely about cost. It is about the operating model the institution wants to run.
Migrating RDS for MySQL to Amazon Aurora: An Operational Reference
Migrating RDS for MySQL to Amazon Aurora is a structurally well-supported operation. The technical work is straightforward; the operational discipline that makes the cutover succeed under audit is the part that matters.

Drupal Security Best Practices for Government and Higher Education
Drupal is a structurally secure CMS, but security in production depends on a small number of operational disciplines applied consistently. For government and higher education workloads, those disciplines are the audit checklist.

Shared vs Dedicated vs VPS vs Managed: The Institutional WordPress Hosting Model Decision
Shared, VPS, dedicated, and managed WordPress hosting are four different operational models. For institutional WordPress operators, the model decision shapes performance, security, cost, and the institution's operational responsibilities. This is the decision filter.

What SaaS Looks Like for Public-Sector IT: A Procurement and Operations View
Software-as-a-Service is well-understood in commercial IT. Public-sector procurement and operations teams have to evaluate SaaS through different lenses: compliance posture, identity integration, data residency, and the long-running operational responsibilities that do not transfer to the vendor.

Why Drupal Performance Optimization Is an Institutional Priority
Drupal performance optimization is sometimes treated as a technical concern that can be deferred. For institutional Drupal sites, it is a strategic priority because of audience expectations, search visibility, accessibility, infrastructure cost, and audit posture.

Transforming Government Websites: What Citizen-Centered Operations Actually Require
Government website transformation is rarely a redesign project. It is an operating-model change: from infrequent procurement-led updates to continuous citizen-centered operations under accessibility, performance, and security discipline.

WordPress Performance for Institutional Sites: The Operational Pattern
WordPress performance for institutional sites comes from disciplined choices at the hosting tier, the plugin tier, the asset tier, and the caching tier. This is the operational pattern that produces sustained performance.
WordPress 6.2 Dolphy: The Institutional Read on the Site Editor Maturity Release
WordPress 6.2 (Dolphy) shipped on March 29, 2023 as the first major release of that year. For institutional WordPress operators, the Site Editor maturity in 6.2 was the inflection point that made full-site editing operationally trustworthy.

Upgrade to Drupal 10 From Any Version: The Institutional Upgrade Matrix
The Drupal 10 upgrade path is different depending on whether the institution is starting from Drupal 7, Drupal 8, or Drupal 9. This is the institutional upgrade matrix with the operational discipline each path requires.

Upgrade to Drupal 10: Lessons From the First Months of Institutional Adoption
Drupal 10 shipped in December 2022. By April 2023, the early-adopter institutional sites had been in production for several months. This is what those first months taught about Drupal 10 in institutional production.

WCAG 2.1 AA for Government Websites: What Title II Enforcement Means in Practice
Title II enforcement deadlines are real. Here's what government agencies need to have in place — and why accessibility can't be a one-time audit.

Five Web Hosting Mistakes That Surface as Compliance Failures
For public-sector and higher-education websites, the worst hosting mistakes do not surface as outages. They surface as accessibility lawsuits, compliance findings, and SEO penalties that compound silently.

Web Security for Public-Sector Sites: Seven Practices That Hold Under Audit
Web security for public-sector websites is operationally distinct from commercial web security. The threats are similar; the operational discipline that holds under FedRAMP, HECVAT, or HIPAA review is different.

Institutional Website Audit: The Operational Framework for Public-Sector Sites
An institutional website audit is a structured assessment across performance, accessibility, security, content integrity, and compliance posture. This is the operational framework that public-sector institutions use.

Multi-Account IAM Governance on AWS: What Public-Sector Workloads Need
Public-sector AWS environments routinely span dozens of accounts. IAM governance at that scale is a discipline rather than a feature. Native AWS tooling and third-party SaaS like IAM Health Cloud each have a role; the structural answer is operational practice, not tool selection.

Why Cascade CMS and Higher Education Websites Work Well Together
Cascade's structural choices match higher education's operating reality: distributed teams, governance pressure, accessibility scrutiny, and content that has to scale without losing brand consistency.
Hosting Drupal on AWS: When the Combination Is the Right Fit
Drupal on AWS is the dominant pattern for institutional Drupal deployments. Five structural reasons make the combination work for public-sector institutional websites.
WordPress 6.1 Misha: What Public-Sector Site Owners Should Know
WordPress 6.1 (Misha) shipped in November 2022 with the performance, accessibility, and editor improvements that institutional WordPress operators care about. This is the operational read on the release.

WordPress 6.2.2: An Urgent Patch as Institutional Cadence Evidence
WordPress 6.2.2 shipped on May 22, 2023 to harden the security patch in 6.2.1. For institutional WordPress operators, this sequence is the canonical example of patch-cadence discipline that audit expects.
WordPress 6.2 Security Posture for Institutional Sites
WordPress powers more than 40 percent of the public web, which makes the WordPress security posture an institutional concern. This is the operational baseline for institutional WordPress against the common vulnerability classes.
WordPress 6.3.1: A Routine Minor Release as Cadence Evidence
WordPress 6.3.1 shipped on August 29, 2023 as a routine maintenance release with no critical security issues. For institutional WordPress operators, applying routine minor releases on documented cadence is the discipline that makes the unusual ones manageable.

WordPress 6.3 Lionel: The Site Editor Comes of Age
WordPress 6.3 (Lionel) shipped on August 8, 2023 as the final release of Phase 2 of the WordPress block-editor roadmap. For institutional WordPress operators, 6.3 was the version where the Site Editor became fully production-grade.
Updating to WordPress 6.3: The Institutional Validation Process
WordPress major-version updates for institutional sites are not single-click operations. They are validated, staged, and documented events. This is the institutional validation process for the WordPress 6.3 update, applicable to every WordPress major release.
WordPress 6.4.1: A Three-Bug Maintenance Release
WordPress 6.4.1 shipped on November 9, 2023 to address three specific bugs in the 6.4 release. For institutional WordPress operators, focused maintenance releases like 6.4.1 are routine cadence work that the institutional patch process handles transparently.
WordPress 6.4.2: A Remote-Code-Execution Patch and the Institutional Security Response
WordPress 6.4.2 shipped on December 6, 2023 with a fix for a remote-code-execution vulnerability chain. For institutional WordPress operators, the 6.4.2 release is the kind of urgent patch that the institutional security response process is built for.

High-Availability WordPress on AWS for Public-Sector Workloads
WordPress high availability on AWS combines multi-AZ infrastructure, managed services, and operational discipline. For public-sector institutional WordPress, the architecture matters less than the operational practice.
WordPress Security in Regulated Environments: What 'Managed' Actually Means
A managed WordPress host patches core and plugins on a schedule. A managed WebOps operator owns the security posture of the entire stack (infrastructure, application, governance) and is accountable when something fails.

WordPress SSH Access for Regulated-Environment Operations
SSH access to WordPress hosting environments is operationally normal in commercial deployments. In regulated public-sector environments, the access pattern requires identity governance, audit logging, and operational discipline that off-the-shelf hosting rarely provides.
WordPress Website Optimization: A 10-Item Institutional Checklist
WordPress optimization for institutional sites comes down to a small set of disciplined choices applied consistently. This is the 10-item checklist that produces measurable gains across the optimization tiers.